


Learning how to clean a countertop reverse osmosis system correctly helps prevent stale water, soap residue, mineral buildup, and avoidable performance problems. The basic routine is straightforward: empty the unit, wash approved removable parts, rinse thoroughly, wipe the exterior, refill with fresh water, and complete the required flush cycle.
Internal sanitizing and descaling require more caution. A sanitizer addresses microbial contamination, while a descaler dissolves mineral deposits. Neither should be put through filters, an RO membrane, or sealed internal components unless the model manual explicitly directs you to do so.
Countertop RO designs also vary. Some have a removable feed-water tank and clean-water carafe, while others use an internal reservoir or direct water connection. Always use the cleaning agents, disassembly steps, contact times, and flushing sequence approved for your specific unit.
Cleaning, Sanitizing, and Descaling Serve Different Purposes
Although the terms are sometimes used interchangeably, countertop RO cleaning, sanitizing, and descaling solve different maintenance problems.

Routine cleaning removes surface residue
Routine cleaning applies primarily to accessible parts such as:
-
Removable feed-water tanks
-
Clean-water carafes or pitchers
-
Tank lids
-
Drip trays
-
Removable accessory pieces
-
Dispensing-area surfaces
-
Exterior housings
Warm water, mild dish soap, a nonabrasive sponge, and thorough rinsing are generally appropriate for washable parts when permitted by the manual. Routine cleaning removes dust, spills, water residue, and material that can collect on frequently handled surfaces.
It does not necessarily sanitize inaccessible lines or internal reservoirs.
Sanitizing addresses possible microbial contamination
Sanitizing uses a model-approved chemical or procedure to reduce microbial contamination inside approved water-contact areas. It may be required after servicing, suspected contamination, prolonged stagnation, or other events identified in the manual.
The correct sanitizer, dosage, contact time, component-removal sequence, and flush procedure are model-dependent. Do not assume a sanitizer used for one RO system is safe for another.
Descaling dissolves mineral deposits
Countertop RO scale consists mainly of mineral deposits left behind as water evaporates or becomes concentrated. It may appear as white, beige, or chalky residue in the feed tank, carafe, drip tray, or another approved water path.
Descaling uses an acidic product—often a manufacturer-approved powder or citric-acid formulation—to dissolve deposits. It does not sanitize the system, and it should not be allowed to contact the RO membrane or filters unless the manufacturer specifically includes those components in the procedure.
Identify your countertop RO design first
Before taking anything apart, determine whether your system has:
-
A removable feed tank and carafe: These user-filled systems usually allow routine washing of several exterior components.
-
A removable feed tank with an internal clean-water reservoir: The tank may be washable, but the sealed reservoir may require a special sanitizing cycle.
-
A direct water connection: Cleaning may require closing the feed-water supply and draining the lines.
-
Heating or cooling functions: Additional precautions may apply because internal components can remain hot or cold after the unit is turned off.
-
UV, remineralization, or other treatment stages: These parts may have separate maintenance requirements.
Do not apply under-sink RO instructions automatically to a countertop appliance. The plumbing, tanks, filters, electronics, and internal flow paths can be substantially different.
Before Cleaning Your Countertop Reverse Osmosis System
A few preparation steps reduce the risk of chemical damage, electrical exposure, and accidental contamination.
Read the model manual
Confirm the following before beginning:
-
Which parts are removable and washable
-
Whether mild dish soap is permitted
-
Whether vinegar, citric acid, bleach, or another product is prohibited
-
Which descaler or sanitizer is approved
-
Whether filters and the RO membrane must be removed
-
Whether the unit has a dedicated cleaning or descaling mode
-
Required soak, circulation, drain, and flush steps
-
Whether opening a sealed component could affect the warranty
If the manual does not describe internal sanitizing or descaling, do not invent a procedure. Contact Frizzlife support for model-specific guidance.
Gather the appropriate supplies
For ordinary cleaning, you may need:
-
Clean water
-
Mild, unscented dish soap
-
A clean, soft cloth
-
A nonabrasive sponge
-
A soft bottle brush, if approved for the carafe or feed tank
-
A clean drying rack or lint-free towel
-
Protective gloves when handling an approved chemical
-
The manufacturer-approved sanitizer or descaler, if needed
Do not use steel wool, scouring pads, abrasive powders, paint thinner, gasoline, alcohol-based solvents, or harsh household surface cleaners on the system.
Prepare the unit and work area
Wash your hands and clear a clean working area. Then:
-
Unplug the appliance.
-
Close the feed-water supply on a directly connected model.
-
Allow heated or cooled components to reach a safe temperature.
-
Remove drinking glasses and food from the immediate area.
-
Keep electrical openings, vents, controls, and the power cord dry.
Never mix bleach, vinegar, citric acid, commercial descaler, ammonia, or other cleaning chemicals. Mixing bleach with acids can release dangerous fumes. Use only one approved product at a time, in the exact manner described by the manufacturer.
Most importantly, do not scrub, soak, or chemically clean the RO membrane. Household RO membranes are normally treated as replaceable components. Any chemical membrane-cleaning process is specialized and must be explicitly authorized for the specific element and appliance.
How to Clean a Countertop Reverse Osmosis System Step by Step
The following process covers routine cleaning of accessible parts. Internal sanitizing and descaling are addressed separately because they require model-specific chemicals and procedures.
Step 1: Drain and discard existing water
Empty the feed-water tank, clean-water carafe, dispensing lines, and other removable vessels as directed by the manual.
Do not save old feed water for the next cycle. Water that has been sitting in the tank may contain concentrated minerals and residue. Continually topping off old water also makes it difficult to keep the tank clean.
If the system has an internal reservoir, use the normal dispensing or drain procedure. Do not tip or invert the appliance unless the manual says it is safe.
Step 2: Remove washable components
Depending on the design, removable parts may include:
-
Feed-water tank
-
Feed-tank lid
-
Clean-water carafe or pitcher
-
Carafe lid
-
Drip tray and drip-tray cover
-
Detachable cup stand
-
Other non-electrical accessories
Remove only the components identified as user-serviceable. Do not open a sealed reservoir, pump housing, heating assembly, cooling assembly, or electronic compartment.
Step 3: Wash approved water-contact parts
Wash removable parts with warm water, mild dish soap, and a soft sponge. Reach into corners and around handles where residue can collect, but avoid aggressive scrubbing.

Use a soft brush only if the manual permits it and the brush cannot scratch the material. Scratches in plastic can trap residue and make future cleaning more difficult.
Avoid using very hot water unless the part is specifically labeled for it. Sudden temperature changes may damage some plastics or glass vessels.
Step 4: Rinse until no soap remains
Rinse each part several times with clean water. Check seams, corners, lid channels, and valves where foam can remain trapped.
Continue rinsing until there is:
-
No visible foam
-
No slippery soap film
-
No detergent smell
-
No soapy taste after the system is restarted
A small amount of residual detergent can create persistent off-tastes and unnecessary foaming.
Step 5: Clean the feed-water tank carefully
The feed tank deserves particular attention because it is frequently opened, touched, and refilled.
To clean the feed-water tank:
-
Empty it completely.
-
Remove the lid and any detachable, washable insert.
-
Wash approved surfaces with mild dish soap and a nonabrasive sponge.
-
Pay attention to corners, the waterline, and the area around the outlet valve.
-
Rinse repeatedly.
-
Allow the tank to drain before refilling it with fresh feed water.
Do not press tools into valves, sensors, or tank connections. If the outlet area cannot be accessed safely, rinse it as directed instead of forcing a brush into it.
Never refill the tank by pouring reject or drain water back into the feed side unless the model instructions explicitly authorize that practice.
Step 6: Clean the carafe and drip tray
Wash the clean-water carafe with the same care used for a drinking-water pitcher. Do not let purified water remain in it indefinitely, particularly during long periods of nonuse.
Remove and wash the drip tray before standing water develops odor or visible residue. The drip tray is not part of the filtration process, but poor drip-tray hygiene can make the dispensing area unpleasant and attract contamination.
Step 7: Wipe the dispensing spout and exterior
Use a clean, damp cloth to wipe around the dispensing area. Do not push soap, sanitizer, cotton swabs, or cleaning tools into the outlet.
Wipe the appliance housing with a soft, damp cloth, then dry it. Keep moisture away from:
-
Control panels
-
Power connections
-
Ventilation openings
-
Filter sensors
-
Heating or cooling vents
-
Seams leading into the electrical housing
Spray cleaner onto the cloth rather than directly onto the appliance—and only use a cleaner approved by the manual.
Step 8: Air-dry or reassemble with clean hands
Place washable parts on a clean rack or lint-free surface. If the manual allows immediate reassembly, shake off excess water and handle the components with freshly washed hands.
Inspect seals and contact surfaces as you work. A twisted gasket, dirty tank connector, or improperly seated lid can cause leakage or error messages.
Step 9: Refill and complete the required flush
Reinstall the tank and accessories, refill the feed tank with fresh water, and reconnect power or water as applicable.
Run the model-specific rinse, startup, or flush cycle. The required number of cycles varies, so do not rely on a universal flush count. Discard all water the manual tells you to discard.
Do not drink the first batch merely because it looks clear. Complete every required cycle first.
Step 10: Check normal operation
After cleaning and flushing, inspect the unit for:
-
Leaks around the tank and seals
-
Warning lights or error codes
-
Unusual pump or dispensing sounds
-
Abnormally slow output
-
Persistent odor or off-taste
-
Particles or discoloration
-
Water collecting beneath the appliance
Stop using the unit if it leaks, repeatedly displays a fault, or produces water with persistent discoloration, particles, or odor.
How to Descale a Countertop Water Purifier Safely
Countertop water purifier descaling is necessary when mineral deposits cannot be removed by normal washing or when the model calls for periodic descaling.
Signs of countertop RO scale
Possible signs include:
-
A white or chalky film in the feed tank
-
Crust around a tank waterline or outlet
-
Deposits in the carafe or drip tray
-
Flakes loosening from approved washable surfaces
-
More frequent mineral residue in a hard-water area
-
Reduced output when internal scaling or fouling is present

Slow water production does not prove that scale is the cause. A clogged prefilter, exhausted filter, fouled membrane, low feed supply, pump problem, or other system fault can produce a similar symptom.
Use only a permitted descaler
Use a manufacturer-approved descaling product or citric-acid solution only when the model instructions permit it. Follow the stated amount, water volume, temperature, circulation time, soak time, and flushing sequence exactly.
More concentrated is not better. An improvised acid concentration can damage seals, plastics, metal components, filters, or the RO membrane.
A safe model-specific process generally follows this pattern:
-
Empty the system as directed.
-
Remove only the components approved for removal.
-
Prepare the descaling solution according to its instructions.
-
Add it to the designated tank or water path.
-
Start the specified cleaning mode or allow the stated soak period.
-
Drain the solution through the approved outlet.
-
Refill and flush for every cycle required by the manual.
-
Resume drinking only after the procedure is complete and no chemical taste or odor remains.
Do not assume the descaling solution should pass through every filter. Some procedures may require filters or the membrane to be removed or bypassed. Others may use a dedicated cycle designed around the installed components.
Can vinegar be used to clean an RO system?
Vinegar should not be treated as a universal RO cleaner or descaler. Although it can dissolve some mineral deposits on ordinary household surfaces, an RO appliance contains multiple materials, seals, filters, and a sensitive membrane. Vinegar may be prohibited, may require a particular dilution, or may be limited to a removable carafe or drip tray.
Use vinegar only if the manual explicitly approves it for the exact component being cleaned. Never combine it with bleach or use it as a substitute for a specified descaling product.
For removable parts, ordinary dish-soap cleaning may be sufficient. For internal scale, use the model-approved descaling procedure rather than experimenting with vinegar.
What should never be used for descaling?
Avoid:
-
Strong or concentrated acids
-
Abrasive descaling powders
-
Solvents
-
Boiling water
-
Improvised chemical mixtures
-
Products containing undisclosed fragrances or additives
-
Any descaler not approved for the unit
-
Direct chemical soaking of the RO membrane
If scale returns quickly, review feed-water suitability and the recommended maintenance interval. Repeated heavy scale may require model-specific support rather than increasingly aggressive cleaning.
How and When to Sanitize a Countertop RO System
Sanitizing is not the same as washing the feed tank or removing scale. It is an internal hygiene procedure that must follow the manufacturer’s sequence.
Situations that may require sanitizing
Check the manual and contact support after:
-
Model-approved servicing of internal water-contact parts
-
An extended period without use
-
Suspected contamination
-
Persistent unexplained odor
-
A contaminated feed-water event
-
A flood affecting the appliance
-
A boil-water advisory involving the source water
After a boil-water advisory or flood, stop using the system for drinking water and follow instructions from local public-health or water authorities. Do not assume an ordinary cleaning cycle makes a potentially contaminated appliance safe. Filters and the membrane may also need replacement.
Can unscented household bleach be used in an RO system?
Some residential RO sanitizing procedures permit a small amount of unscented household bleach. That does not mean bleach is safe for every countertop RO system.
Do not add bleach unless the manual confirms:
-
Bleach is an approved sanitizer
-
The correct concentration and dosage
-
Where it should be added
-
Whether filters and the membrane must be removed
-
The required contact time
-
The correct drain and flushing sequence
Never estimate a dose based on instructions for another appliance. Scented, splashless, thickened, or additive-containing bleach products should not be substituted for a specifically approved sanitizer.
Follow the model-specific sanitizing sequence
Where sanitizing is permitted, the process may involve draining the system, removing certain treatment elements, introducing sanitizer into an approved empty housing or tank, allowing a specified contact time, and flushing thoroughly.
The order matters. Sanitizer retained by a filter or membrane can be difficult to remove and may damage treatment media. Conversely, removing a component when it is supposed to remain installed can prevent the procedure from sanitizing the intended water path.
Continue flushing for the full sequence in the manual. Do not drink the water if sanitizer odor or taste remains.
If contamination may have reached a filter, membrane, sealed reservoir, or inaccessible line, sanitizing alone may not be sufficient. Replace compromised components or request service as directed.
How Often Should You Clean a Countertop RO System?
How often should you clean a countertop RO system? Follow the maintenance interval in your model manual, and clean accessible parts sooner whenever you notice stagnant water, film, odor, sediment, or visible residue. Descale when deposits appear or at the model-specific interval. Sanitize only when the manual requires it or after circumstances such as prolonged nonuse, servicing, or suspected contamination.
Avoid applying a generic weekly, monthly, or annual schedule to every countertop RO appliance. Feed-water hardness, daily use, room conditions, tank design, and the time water remains in the unit can all change the appropriate maintenance frequency.
|
Part or condition |
What to look for |
Appropriate action |
|
Feed-water tank |
Waterline film, sediment, odor, stagnant water |
Empty, wash, rinse, and refill with fresh water |
|
Clean-water carafe |
Film, scale, stale water, handling residue |
Wash with mild soap and rinse thoroughly |
|
Drip tray |
Standing water, spots, residue, odor |
Empty and wash promptly |
|
Dispensing area |
Splashes, dust, residue |
Wipe with a clean damp cloth |
|
Exterior |
Spills, fingerprints, dust |
Wipe as needed without wetting openings |
|
Mineral deposits |
White or chalky buildup |
Use the approved descaling procedure |
|
Extended idle period |
Stagnant water or dried components |
Clean, inspect, sanitize if directed, and flush |
|
Suspected contamination |
Unusual source-water event, flood, persistent odor |
Stop use and follow the approved sanitizing or service procedure |
|
Slow output |
Flow remains lower than normal |
Check scale, filters, membrane status, tank placement, and system alerts |
|
Expired or damaged filter |
Time, capacity, damage, or warning indicated by the model |
Replace; do not attempt to restore it by washing |
Instead of continually topping off the feed tank, discard remaining old water at the appropriate point in the operating cycle, rinse as needed, and refill with fresh feed water. Follow the unit’s operating instructions for handling concentrated water left in the tank.
Descale when deposits appear or at the model-specific interval. Sanitize only according to the manual and when the maintenance schedule or circumstances call for it.
Restarting a Countertop RO After Storage or Long Downtime
A unit that has been unused for an extended period needs more than a fresh tank of water.
Inspect before restarting
Check:
-
Feed tank and carafe for residue or odor
-
Seals and tank connectors for cracking or distortion
-
Dispensing outlet for visible contamination
-
Filter status and expiration indicators
-
Power cord and plug for damage
-
Housing and base for signs of leakage
-
Internal areas visible without opening sealed panels

Discard all stagnant water. Wash every approved removable water-contact component and determine whether the manual requires sanitizing after extended nonuse.
Filters that are expired, contaminated, dried out, damaged, or not approved for reuse after storage should be replaced. Do not soak an old filter in soap, bleach, or descaler in an attempt to restore it.
Flush before drinking
Complete the full startup flush sequence and discard the flushed water. Newly installed or restarted filters can release trapped air, which may make the water temporarily bubbly or cloudy. Air-related cloudiness commonly clears after the water stands and after the required flushing is completed.
Stop using the unit if cloudiness does not clear, or if the water continues to contain discoloration, particles, unusual odor, or an abnormal taste. Persistent symptoms need troubleshooting rather than additional blind flushing.
Troubleshooting After Countertop RO Cleaning
Use the symptom, timing, and maintenance history to decide whether to clean, descale, sanitize, replace a component, or request service.
|
Symptom |
Possible cause |
First action |
When cleaning is not enough |
|
Soapy taste or foam |
Incomplete rinsing |
Rewash and rinse removable parts; complete another approved flush |
Contact support if the taste persists |
|
Sanitizer odor or taste |
Incomplete post-sanitizing flush |
Continue the required flushing sequence |
Stop use if odor remains after the full procedure |
|
Stale or musty taste |
Old feed water, stagnant carafe, expired filter, contamination |
Empty, clean, refill, and check filter status |
Sanitize or replace parts as directed |
|
Slow output |
Scale, clogged prefilter, membrane fouling, incorrect tank placement, system fault |
Check deposits, alerts, tank seating, and maintenance status |
Replace due components or request service |
|
Recurring white deposits |
Hard feed water or insufficient descaling |
Clean visible surfaces and follow the approved descaling schedule |
Ask support about feed-water suitability |
|
Leak after cleaning |
Misaligned tank, seal, connector, lid, or accessory |
Unplug, drain if safe, and reseat approved removable parts |
Replace damaged seals or request service |
|
Temporary bubbles |
Trapped air after restart or filter replacement |
Complete flushing and let a glass stand briefly |
Investigate if cloudiness persists |
|
Particles or discoloration |
Incomplete startup flush, deteriorated component, contamination |
Stop drinking and review the flush procedure |
Replace filters or obtain service |
|
Repeated warning light |
Improper reassembly, maintenance alert, sensor or system fault |
Check the manual and reseat approved parts |
Contact support rather than opening the housing |
When should the RO membrane be replaced instead of cleaned?
Do not physically scrub an RO membrane. Replacement may be appropriate when:
-
The model indicates that the membrane has reached its replacement point
-
The membrane is damaged or contaminated
-
Output remains abnormally slow after other causes are addressed
-
Water-quality performance does not return to normal after approved maintenance
-
The manufacturer directs replacement following storage or a contamination event
The same principle applies to sealed internal reservoirs. A removable feed tank can often be washed, but an inaccessible reservoir is normally sanitized through an approved procedure or serviced as an assembly. Do not open or scrub it.
If the appliance has persistent leaks, repeated faults, unavailable replacement components, a compromised sealed water path, or maintenance needs beyond its serviceable design, replacing the unit may be more practical than repeated cleaning. You can review current Frizzlife countertop reverse osmosis systems when replacement or a different countertop configuration becomes the appropriate next step.
When Cleaning Is No Longer Enough
If maintenance no longer restores normal performance, the next step may be replacing the filter, choosing another countertop RO system, or moving to a permanent under-sink setup.

Frizzlife WB99-C Countertop RO System
Prefer to stay with a countertop setup? Explore a plug-and-play Frizzlife countertop RO option with removable water-contact components designed for convenient everyday use.
View WB99-C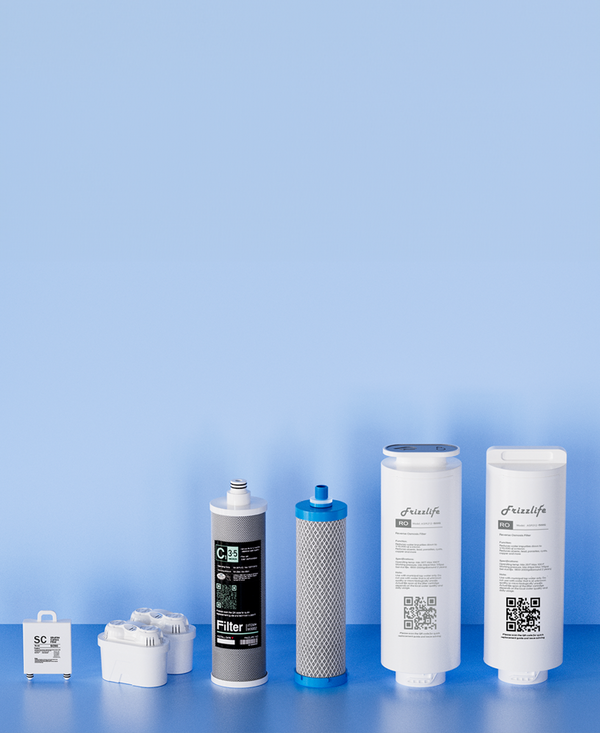
Find the Correct Replacement Filter
An expired, damaged, contaminated, or severely fouled filter should be replaced rather than washed. Use the Frizzlife replacement filter page to find the compatible cartridge for your system.
Shop Replacement Filters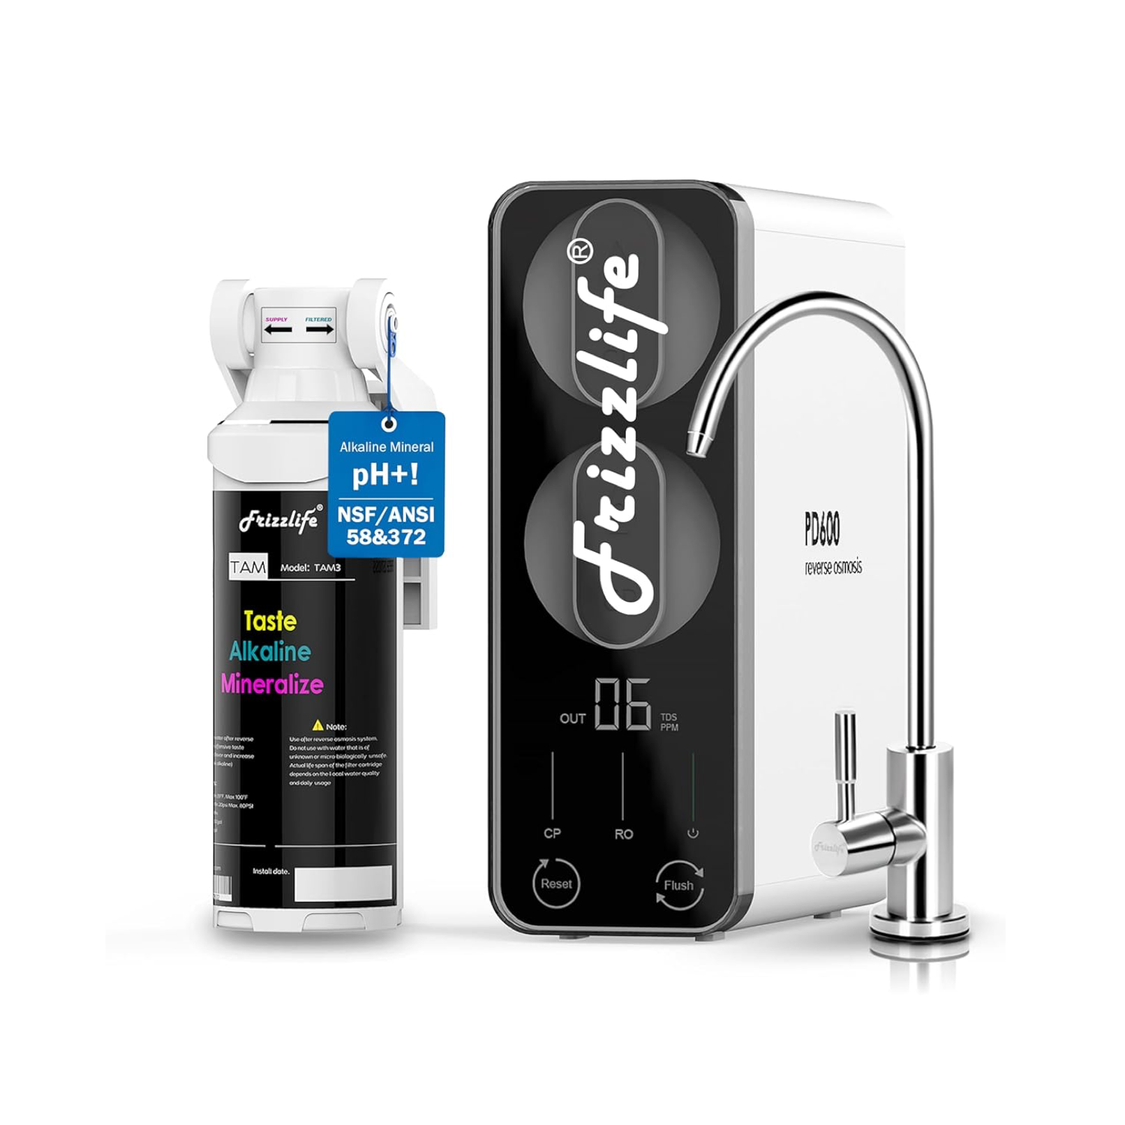
Frizzlife PD600-TAM3 Under-Sink RO System
If you would rather move from a countertop appliance to a permanent kitchen installation, an under-sink RO system provides a different setup with filtration equipment kept below the sink.
View PD600-TAM3Countertop RO Cleaning Mistakes to Avoid
Avoid these high-risk cleaning mistakes:
-
Mixing cleaning chemicals: Never combine bleach with vinegar, citric acid, descaler, ammonia, or another cleaner.
-
Using an unapproved sanitizer or descaler: The chemical, dosage, contact time, and water path must match the model manual.
-
Exposing filters or the RO membrane to chemicals by assumption: Remove, bypass, or leave treatment elements installed only as directed.
-
Opening or submerging sealed parts: Internal reservoirs, pumps, heating or cooling assemblies, and electrical housings are not routine washing areas.
-
Leaving soap or chemical residue: Rinse removable parts thoroughly and complete every required flush before drinking the water.
-
Trying to clean an expired or damaged filter: Washing cannot restore exhausted, contaminated, or severely fouled treatment media.
Keep routine countertop RO cleaning simple: wash approved removable parts, rinse thoroughly, refill with fresh feed water, and complete the specified flush. If odor, scale, low output, contamination concerns, or leaks remain after approved maintenance, stop using improvised cleaning methods and follow the model’s replacement or service guidance.
References
-
County of Ventura Resource Management Agency, “Sanitizing a Reverse Osmosis Filtration System”: https://rma.venturacounty.gov/wp-content/uploads/2024/02/sanitizing-a-reverse-osmosis-filtration-system.pdf