


An RO tank not filling usually points to one of four conditions: water cannot enter the system, the reverse osmosis unit is producing water too slowly, the storage tank’s air charge is incorrect, or a valve or control component is restricting flow.
Start with the simple checks before replacing parts. Confirm that the feed-water and tank valves are open, inspect the tubing, look for leaks, and review anything changed during recent maintenance. If those checks do not resolve the problem, test feed pressure, filter condition, membrane production, and empty-tank air pressure in that order.
Do not assume the tank itself has failed simply because the faucet has little water. A clogged prefilter, low supply pressure, kinked tube, or closed valve can leave a perfectly functional tank empty.
Safety note: Before disconnecting tubing or opening a filter housing, close the feed-water valve, close the tank valve when appropriate, open the RO faucet to relieve pressure, and keep towels or a container nearby. Follow the instructions for your specific system and tank. Stop if a connection leaks or a repair would require an unverified plumbing modification.
Understanding Snapshot: Why an RO Tank Stays Empty
A tank-based reverse osmosis system uses household water pressure to move feed water through its filtration stages and RO membrane. The purified water then enters a storage tank containing a separated air chamber and water chamber. As the water side fills, it compresses the air side. That stored air pressure later pushes water toward the faucet.
A problem anywhere along that path can create the same complaint: the RO tank is not filling with water.
Common causes include:
-
A closed or partially closed feed-water valve
-
A closed tank valve
-
Kinked, pinched, blocked, or incorrectly routed tubing
-
Low incoming water pressure
-
Restricted sediment or carbon prefilters
-
A fouled or spent RO membrane
-
Incorrect empty-tank air pressure
-
A damaged tank bladder
-
A malfunctioning check valve, automatic shutoff valve, or drain-flow control
-
A filter or tube disturbed during recent maintenance
Why is my reverse osmosis storage tank not filling?
The tank stays empty when the RO system either cannot produce purified water or cannot deliver that water into the tank.
If the tank remains light and the faucet produces almost nothing, begin on the production side: check the feed valve, incoming pressure, prefilters, membrane, and tubing. If the tank feels heavy but provides little usable water, investigate tank air pressure, a blocked delivery line, or a possible bladder problem.
The timing of the symptom also matters. A reverse osmosis storage tank problem that starts immediately after a filter change is more likely to involve a closed valve, improperly seated filter, incompatible component, or disturbed tube than a tank that happened to fail at the same moment.
How to distinguish normal refill time from a reverse osmosis storage tank problem
RO membranes produce purified water gradually. Unlike a conventional faucet supply line, the membrane does not refill a storage tank instantly after a large draw. A tank may therefore feel light for a period after it has been emptied.
Suspect a real filling problem when one or more of these conditions applies:
-
The tank does not become noticeably heavier after the model’s expected refill period.
-
Refill performance is significantly slower than it was under similar conditions.
-
The faucet continues to deliver only a drip or unusually thin stream.
-
The system appears to send water to the drain but stores little or no usable water.
-
The tank becomes heavy, yet only a small amount of water comes from the faucet.
-
The problem began immediately after plumbing work or filter service.
-
The unit repeatedly starts and stops without restoring normal storage.
Compare current behavior with the system’s previous performance under similar water usage, temperature, and pressure. A gradual slowdown suggests filter restriction, membrane fouling, changing feed conditions, or tank-charge deterioration. A sudden failure more often points to a valve position, tubing problem, leak, or disturbed component.
How long should an RO tank take to fill?
There is no universal RO tank fill time. The correct expectation depends on:
-
System model and membrane capacity: Different membranes produce water at different rates.
-
Tank size and current water level: A fully drained tank takes longer to recover than a partially used one.
-
Incoming water pressure: Lower pressure reduces the driving force across the membrane.
-
Water temperature: Cold feed water generally moves through an RO membrane more slowly than warmer feed water.
-
Incoming water quality: Sediment, dissolved minerals, and other feed-water conditions can affect filter restriction and membrane performance.
-
Filter and membrane condition: Loaded prefilters and a fouled membrane reduce production.
-
Tank air charge: Incorrect pressure changes how much water the tank can accept and deliver.
-
Household demand: A refrigerator, ice maker, or repeated faucet use can consume water while the tank is attempting to refill.
Use the refill guidance in the manual for your exact system. If the tank takes substantially longer than its normal historical performance, troubleshoot the change rather than relying on a generic number of hours.
Diagnose the RO Tank Not Filling Before Replacing Parts
The most effective diagnostic approach is to separate the problem into three areas:
-
Supply: Is feed water reaching the RO system at adequate pressure?
-
Production: Is the system making purified water?
-
Storage and delivery: Can water enter the tank and leave it through the faucet?
Replacing the tank will not correct a closed feed valve or clogged prefilter. Likewise, installing a new membrane will not correct excessive tank air pressure or a pinched tank tube.
RO tank not filling: symptom and next-check table
Use this decision table to identify the most useful next check.
|
Observed symptom |
More likely area |
Recommended response
|
|---|---|---|
|
Tank is light, faucet is dry, and no production is apparent |
Feed supply, closed valve, severe restriction, or tubing problem |
Confirm feed and tank valves, inspect tubing, check supply pressure, and review prefilters |
|
Tank is light, but the faucet produces a slow drip with the tank valve closed |
System is producing some water, but production may be slow |
Check feed pressure, prefilter condition, membrane condition, and drain-flow behavior |
|
Tank is heavy but delivers very little water |
Tank air charge, bladder, delivery tubing, faucet, or post-filter |
Fully drain and test tank pressure; inspect the air valve and downstream flow path |
|
Tank fills only partially or appears to stop early |
Excessive empty-tank air pressure, premature shutoff, or reduced production |
Verify drained-tank pressure against the tank manual; then evaluate production and valve behavior |
|
Problem started after a filter change |
Closed valve, incorrectly seated filter, incompatible part, trapped air, or disturbed tube |
Recheck every serviced component and restore the system according to its manual |
|
Water continuously runs to the drain while storage remains poor |
Low production, check-valve issue, automatic shutoff problem, or drain-flow-control problem |
Confirm pressure and filters first; request model-specific support if drain behavior remains abnormal |
|
Water appears at the Schrader air valve |
Possible bladder failure |
Stop attempting to recharge the tank and evaluate tank replacement |
These symptoms narrow the search, but they do not prove that a specific part has failed. Complete the basic checks before ordering replacement components.
Why is my reverse osmosis tank not filling but the faucet still works?
The faucet may still work because it is receiving a small amount of water directly from the RO membrane, even though the tank is not storing water. With the tank valve closed, direct membrane production normally appears much weaker than tank-assisted faucet flow.
A thin stream or drip can therefore mean the system is producing water, but one of the following is happening:
-
Production is too slow to restore the tank normally.
-
The tank valve is closed or obstructed.
-
The tube leading to the tank is kinked or blocked.
-
Tank air pressure is too high, limiting how much water can enter.
-
A check valve or control component is not behaving correctly.
-
Water demand is using production before meaningful storage can accumulate.
The faucet can also appear functional when the tank contains only a small reserve. Test again after closing the tank valve and relieving stored pressure. If the faucet then delivers no water at all, the production-side path requires attention. If it produces a small but continuous amount, the membrane is making at least some water, though not necessarily at the correct rate.
Ordered Troubleshooting Procedure
Work from the easiest, least invasive checks toward component-level diagnosis.
Confirm the feed-water valve and tank valve are fully open
Verify both valves by looking at their actual positions rather than assuming they were reopened after service.
On many quarter-turn tank valves, the handle is generally aligned with the tubing or flow path when open and perpendicular when closed. Valve design can vary, so check the system instructions if the position is unclear.
Also confirm that:
-
The cold-water supply is available.
-
No upstream shutoff was left closed after plumbing work.
-
A household pressure-reducing valve or well-system issue is not affecting supply.
-
The RO faucet is closed while the tank is refilling.
-
Connected appliances are not continuously drawing water.
A partially open valve may allow enough flow to make troubleshooting confusing while still preventing normal production.
Inspect tubing for kinks, pinches, incorrect routing, and blocked connections

Trace each accessible tube from the feed connection through the system, tank, faucet, and drain connection. Look for:
-
Tubing bent sharply behind the unit
-
A line trapped under the tank or cabinet contents
-
A tube pushed against a cabinet hinge
-
A connection that was moved during filter service
-
Tubing inserted into the wrong port
-
A fitting that is not fully seated
-
Visible debris or damage at a connection
Do not reroute tubing based on color alone unless the manual confirms the color coding. Port functions and layouts vary by model.
Check for leaks and relieve system pressure before maintenance
Inspect fittings, filter housings, valves, and the floor of the cabinet for moisture. Even a small leak can lower pressure or indicate that a component was not restored correctly.
Before opening a housing or disconnecting a line:
-
Close the feed-water valve.
-
Close the tank valve if the procedure calls for isolating the tank.
-
Open the RO faucet to relieve pressure.
-
Place towels and a container beneath the work area.
-
Confirm that flow has stopped before loosening anything.
After reassembly, restore water slowly and inspect every disturbed connection.
Test whether the system is producing water with the tank isolated
This test helps separate a production problem from a storage problem.
-
Close the tank valve.
-
Leave the feed-water supply open.
-
Open the RO faucet.
-
Allow time for stored pressure in the faucet line to dissipate.
-
Observe whether any new purified water is produced.
Direct membrane flow is normally much slower than flow from a pressurized tank. A small continuing stream or drip indicates at least some production. No ongoing output suggests checking the feed supply, filter restriction, membrane, and control components.
Do not judge membrane condition from this observation alone. Feed pressure, water temperature, and system design all affect direct output.
Review recent changes to plumbing, water supply, or system demand
Ask what changed just before the RO pressure tank stopped filling:
-
Were filters or the membrane replaced?
-
Was the under-sink cabinet reorganized?
-
Was a shutoff valve used?
-
Was a refrigerator or ice maker connected?
-
Was household plumbing repaired?
-
Was a pressure-reducing valve adjusted?
-
Did the weather turn colder?
-
Has water demand increased?
-
Is a well pressure system cycling differently?
This timeline often identifies the problem faster than replacing components one by one.
Production-Side Causes That Keep an RO Tank Empty
When the valves and tubing appear correct, determine whether the system has enough pressure and unrestricted flow to make purified water.
Can low water pressure cause a reverse osmosis tank not to fill?
Yes. Low incoming pressure can slow or prevent normal RO production because pressure is needed to move water across the membrane. If the system makes purified water too slowly, the tank may remain empty or never recover between uses.
Possible pressure-related patterns include:
-
The system works better at certain times of day.
-
Performance changes as a well pump cycles.
-
Faucet flow throughout the home is also weaker.
-
The RO system produces a drip but cannot rebuild storage.
-
Performance declined after changes to a household pressure regulator.
-
Cold-water supply pressure is lower than before.
Do not apply one universal minimum pressure to every RO system. Operating requirements vary by model and configuration.
How to verify feed pressure against the model-specific operating requirement
Use the operating range in the manual for the exact RO model. If pressure measurement is needed, use an appropriate water-pressure gauge at a suitable cold-water connection, or have a qualified plumber perform the test.
Measure under realistic conditions. A static reading taken when no fixtures are operating may not reveal a pressure drop that occurs when showers, appliances, or irrigation systems run.
If pressure is below the model’s required range, identify the household cause before modifying the RO system. A booster or plumbing adjustment may be appropriate for some installations, but it must be compatible with the system and local plumbing conditions.
Which filters or valves should I check when the RO tank stays empty?
Check components in flow-path order:
-
Feed-water shutoff valve
-
Sediment and carbon prefilters
-
RO membrane
-
Membrane outlet check valve
-
Automatic shutoff valve
-
Drain-flow-control component
-
Tank valve
-
Tank tubing
-
Post-filter and faucet delivery path
Not every system uses the same layout. Consult the model diagram before removing or testing any valve.
Clogged prefilters versus a fouled or spent RO membrane
Restricted prefilters lower the pressure and flow reaching the membrane. This can make a membrane appear defective even when the real cause is an upstream filter loaded with sediment or other material.
Signs that point toward prefilter restriction include:
-
Production declined gradually.
-
Incoming water has recently contained more visible sediment.
-
The system improves after compatible prefilters are installed correctly.
-
Water reaches the system, but membrane production is unusually low.
A fouled or spent membrane can also reduce production, but it should not be the first assumption. Check valve positions, feed pressure, tubing, and prefilter condition first. Membrane condition may require more than a visual inspection, and any water-quality or performance test should follow the model’s instructions.
Check-valve, automatic-shutoff-valve, and drain-flow-control symptoms
These components regulate direction, pressure, and drain behavior.
-
A check-valve problem may interfere with purified-water movement or prevent the system from holding pressure correctly.
-
An automatic shutoff valve problem may cause premature stopping or continued operation when the tank should trigger shutoff.
-
A drain-flow-control problem can upset the pressure balance required for normal membrane production.
Continuous drain flow, repeated cycling, or little purified-water production despite verified feed pressure may justify component-level diagnosis. These symptoms overlap, so avoid replacing a valve based on drain noise alone. Contact Frizzlife support for model-specific testing instructions.
When filter restriction is confirmed
Replace only the restricted component with a filter or membrane compatible with the exact system. Compatibility affects fit, sealing, flow, and system operation.
Frizzlife owners can review available replacement filters after confirming the system model and the stage that needs service. Follow the model-specific replacement and flushing procedure rather than using a generic maintenance interval.
A post-filter is usually located on the delivery side between the tank and faucet. If the tank becomes heavy but faucet flow remains weak, inspect that downstream path. Compatible RO post-filters may be relevant when a post-filter restriction has been confirmed, but replacing one will not correct low feed pressure or poor membrane production.
How to Measure and Adjust RO Tank Pressure Safely
Tank pressure is one of the most commonly misunderstood parts of diagnosing a reverse osmosis tank not filling. The critical rule is simple: measure the air charge only after the water side has been fully drained.
Why tank air pressure must be measured only when the tank is fully drained
Pressure measured while water remains in the tank reflects the compressed state of the air chamber. It does not show the tank’s true empty pre-charge and can lead to an incorrect adjustment.
To prepare the tank:
-
Close the feed-water valve.
-
Open the RO faucet.
-
Allow the tank to drain until water stops.
-
Keep the faucet open while checking the air charge.
-
Confirm that the tank is as fully drained as the system allows.
If the tank is heavy but water stops flowing, it may have insufficient air pressure or a bladder problem. Follow the tank manual or request support before forcing water out.
How to check the Schrader valve with a low-pressure gauge

The air valve is commonly a Schrader-style valve similar to a tire valve, often located beneath a cap on the tank.
Once the tank is fully drained:
-
Remove the protective valve cap.
-
Briefly inspect the valve for moisture.
-
Attach a low-pressure gauge.
-
Record the reading.
-
Compare it with the specification for that exact tank.
-
Add or release air only as the manual directs.
-
Recheck the reading and reinstall the cap.
Use a gauge suitable for low-pressure measurements. A gauge intended mainly for high-pressure applications may not provide enough resolution for an accurate adjustment.
Can low tank air pressure stop an RO tank from filling correctly?
Low air pressure more commonly prevents the tank from delivering its stored water effectively. The tank may become waterlogged or unusually heavy, while faucet flow weakens quickly. Because the tank cannot empty normally, owners may interpret the symptom as a refill failure.
Restoring the correct empty-tank air charge may improve usable flow if the bladder is intact and the tank holds pressure. Air should be added gradually, with the faucet open and the water side drained, according to the tank instructions.
Why excessive air pressure reduces usable storage volume
Excessive empty-tank air pressure leaves less room for water and creates stronger resistance against incoming RO production. The tank may seem to fill partially and then stop early.
Do not add extra air in an attempt to increase faucet pressure. More pre-charge does not automatically mean more usable water, and overpressurizing the tank can create poor storage performance.
Follow the tank manual rather than assuming one universal PSI target
Published guidance commonly discusses empty-tank air charges in a relatively low pressure range, but the exact setting is model-dependent. Different tanks and systems may specify different targets.
The tank label or manual is the source of truth. If the correct specification cannot be confirmed, contact Frizzlife support before making an adjustment.
Water at the air valve and other signs of possible bladder failure
Pressing the Schrader valve should release air, not water. Water appearing at the air valve is a strong sign that the internal bladder or diaphragm may be compromised.
Other warning signs include:
-
The tank will not hold air after a correct adjustment.
-
It stays heavy even though no water reaches the faucet.
-
Repressurizing provides only a brief improvement.
-
The tank repeatedly becomes waterlogged.
-
There is visible corrosion, physical damage, or leakage.
A damaged internal bladder is generally not corrected by repeated air adjustments. The tank may need replacement.
Troubleshooting After Filter or System Maintenance
Why did my reverse osmosis tank stop filling after a filter change?
If the RO tank stopped filling immediately after a filter or membrane change, assume the service work interrupted flow before concluding that the tank failed. Retrace the maintenance in this order:
-
Confirm that every replacement component matches the exact system model and filtration stage.
-
Remove any protective packaging or shipping cap required by the product instructions.
-
Verify each filter or membrane position, orientation, seating, housing, and connection.
-
Inspect every tube touched during service for pinching, partial disconnection, incorrect routing, or incomplete insertion.
-
Confirm that both the feed-water valve and tank valve are fully open.
-
Restore water pressure slowly and inspect every disturbed connection for leaks.
-
Complete the model-specific startup and flushing procedure before judging refill time or tank capacity.
Do not overtighten a housing or fitting to stop a leak. Depressurize the system and correct the seal or connection according to the manual. A simultaneous tank failure is possible, but it is a less useful starting assumption when the symptom began directly after maintenance.
Confirm that replacement filters and membranes are compatible with the system
A component that appears physically similar may still have different sealing, flow, or operating characteristics. Use model-compatible filters and membranes and verify the exact stage being replaced.
If production stopped after installing a new membrane, recheck its orientation, seating, connections, and any model-specific preparation steps before concluding that the new component is defective.
Flush and monitor the system according to its model instructions
Filter and membrane replacement can introduce air into the system. Temporary cloudiness, irregular faucet flow, or startup noise may occur while air is cleared, but the required flushing process and expected behavior vary by model.
Keep the RO faucet, tank valve, and feed valve in the positions specified by the instructions. Do not judge final tank capacity until the required startup and flushing procedure is complete.
Separate a post-filter flow restriction from a true tank-refill problem
A restricted post-filter can reduce faucet flow even while the tank fills normally. This distinction prevents unnecessary tank or membrane replacement.
-
If the tank becomes heavier but faucet output is weak, inspect the path from the tank through the post-filter to the faucet.
-
If the tank remains light, the problem is more likely before the tank or at its inlet.
-
If the tank is heavy and pressure testing is normal, inspect downstream tubing, the post-filter, and the faucet.
Because system layouts vary, use the model’s flow diagram to identify whether the post-filter is downstream of the tank.
When Maintenance Becomes a Part or System Decision
When repressurizing may help and when the storage tank may need replacement
Repressurizing may help when:
-
The drained-tank air pressure is below the specified setting.
-
No water appears at the air valve.
-
The tank holds the corrected air charge.
-
The bladder still allows normal filling and delivery.
Tank replacement may be appropriate when:
-
Water exits the Schrader valve.
-
The tank cannot hold air.
-
The tank remains waterlogged after a correct adjustment.
-
Usable capacity does not return despite verified production and proper pressure.
-
The tank is leaking, corroded, or physically damaged.
When valve or control-component diagnosis requires Frizzlife support
Request model-specific support when the system has adequate feed pressure and compatible filters but still shows:
-
Persistent or abnormal drain flow
-
Repeated start-stop cycling
-
No movement of water toward the tank
-
Suspected automatic shutoff or check-valve failure
-
A connection layout that does not match available instructions
-
A leak that returns after correct reseating
-
Pressure behavior that cannot be explained by the tank specification
Control components can produce overlapping symptoms. Model-specific testing is safer and more reliable than replacing valves by trial and error.
When persistent production problems justify evaluating a replacement RO system
A complete system replacement should not be the first response to an empty tank. It becomes a reasonable decision when the existing unit has multiple unresolved component problems, cannot operate under the available water conditions, is incompatible with available replacement parts, or continues to perform poorly after verified maintenance.
If troubleshooting establishes that repair is no longer practical, compare current Frizzlife reverse osmosis systems by installation requirements, configuration, and model-specific operating specifications. The replacement must fit the home’s actual feed pressure, space, plumbing, and water-demand conditions.
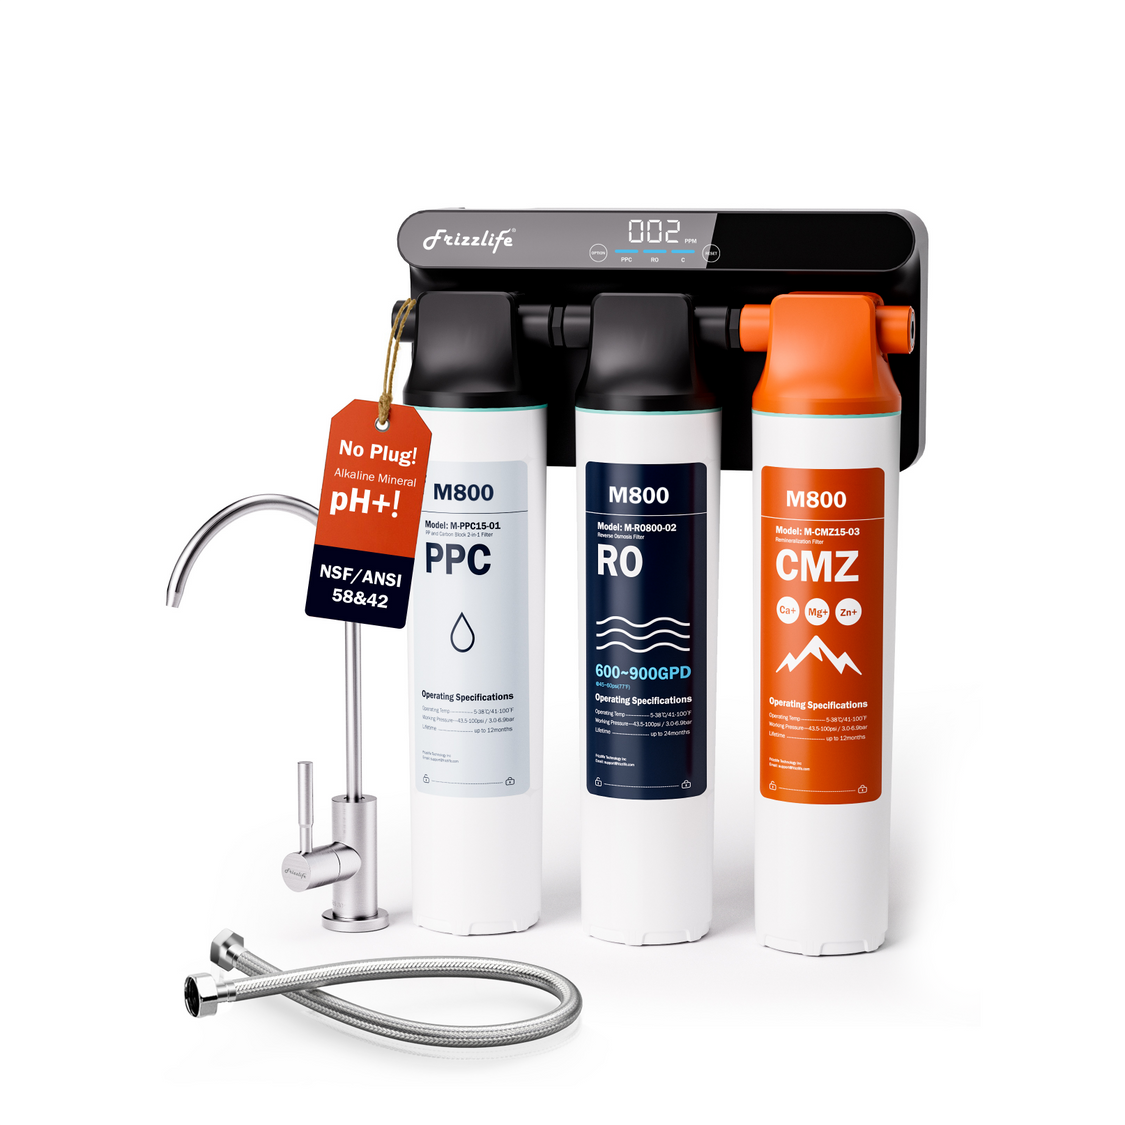
Frizzlife M800 Tankless Reverse Osmosis System
If repeated storage-tank problems make a full system replacement more practical, a tankless RO design is another option to consider. The M800 operates without a pressurized storage tank and is designed for an under-sink RO setup.
Explore M800Stop troubleshooting if adjustments cause leaks or require unverified plumbing modifications
Stop and request qualified help if:
-
A fitting, housing, tank, or valve leaks after adjustment.
-
A tube cannot be reseated securely.
-
Household pressure controls need modification.
-
Electrical or pump components require diagnosis.
-
The correct pressure specification cannot be confirmed.
-
The system configuration differs from the manual.
-
The repair would require drilling, cutting, or altering household plumbing without verified instructions.
Do not keep pressurizing a leaking system to see whether the problem resolves itself.
Preventing Another RO Tank Filling Problem
Restore every valve and connection after filter service
Use a short post-maintenance check each time the system is serviced:
-
Feed-water valve open
-
Tank valve open
-
RO faucet in the required operating position
-
Filters seated correctly
-
Tubing fully inserted and free of kinks
-
No moisture around fittings or housings
-
Flush procedure completed
-
Tank beginning to gain weight during refill
Taking a photo of the tubing and valve positions before service can help prevent routing mistakes.
Track filter condition based on the model, usage, and incoming water quality
Filter condition depends on the specific system, water use, and incoming water quality. A fixed generic replacement schedule cannot account for every installation.
Keep a service record that includes:
-
Filter and membrane replacement dates
-
Changes in faucet flow
-
Approximate refill behavior
-
Feed-pressure changes
-
Unusual drain operation
-
Water-quality changes
-
Tank-pressure checks and adjustments
A performance change between service dates may justify inspection even if a calendar-based replacement date has not arrived.
Check tank performance when refill time or faucet flow changes
Early symptoms are easier to diagnose than a completely empty tank. Investigate when:
-
Refill takes noticeably longer than before.
-
Faucet pressure fades sooner.
-
The tank feels heavier but provides less water.
-
The system runs or drains differently.
-
Performance changes after plumbing work.
-
Connected appliance demand increases.
Use the same diagnostic order each time: valves and tubing, feed pressure, production filters and membrane, drained-tank pressure, then control components.
Verify model-specific pressure and maintenance instructions before making adjustments
The correct feed-pressure range, tank pre-charge, filter compatibility, flushing process, and valve-testing procedure depend on the system. Confirm those details from the product manual or Frizzlife support before adding air, replacing components, or changing plumbing.
When an RO tank is not filling, simple causes should be ruled out first. An open valve, corrected tube, compatible filter, or proper empty-tank air charge may restore operation. If the system still cannot produce or store water after those checks, use the symptoms to determine whether the next step is a filter, membrane, tank, valve, or system-level decision.
Reference
https://www.epa.gov/watersense/point-use-reverse-osmosis-systems