


An under sink water filtration system can be a practical way to treat water at the kitchen sink, but the cabinet location alone does not make every system compatible with every kitchen. Before choosing a filter, confirm that you have the right cold-water connection, cabinet space, faucet configuration, water pressure, drain access, and—when required—electrical power.
Reverse osmosis adds several installation requirements that many non-RO filters do not have. An under sink RO system typically needs a feed-water connection, a filtered-water faucet or compatible delivery connection, and a drain route for reject water. Tanked systems also need room for a storage tank, while powered or pump-assisted systems may need an electrical outlet.
Use this guide to decide whether your kitchen is a clear go, a conditional go, or a no-go for under-sink RO installation.
Under-Sink RO Installation Requirements: Does Your Kitchen Fit?
A kitchen is generally suitable for an under-sink RO system when it has:
-
An accessible cold-water supply and working shut-off valve
-
Compatible plumbing connections or room for an approved feed adapter
-
A legal, accessible drain connection
-
Enough cabinet space for the unit, tubing, and any storage tank
-
A suitable faucet hole or permission to drill one when required
-
Feed-water pressure within the selected model’s operating range
-
An electrical outlet if the system uses a pump, display, sensor, or powered controls
-
Feed water that falls within the model’s water-quality limitations
Failure at one checkpoint does not always make the installation impossible. Low pressure may be addressed with a compatible booster pump, for example, and limited cabinet space may favor a compact or tankless design. However, missing drain access, unsafe source water, prohibited cabinet modifications, or incompatible plumbing can create a genuine no-go.
Decision Snapshot: The Essential Go/No-Go Requirements
|
Installation factor |
Go |
Conditional go |
No-go until corrected |
|---|---|---|---|
|
Cold-water supply |
Accessible cold line with a working shut-off valve |
Adapter or valve replacement is needed |
Only a hot-water connection is available |
|
Cabinet space |
Unit, tubing, and tank fit with service clearance |
Cabinet storage must be rearranged or a compact design selected |
Components cannot fit or be safely mounted |
|
Faucet setup |
Existing compatible hole or approved faucet arrangement |
Drilling or a different faucet configuration is needed |
Drilling is prohibited and no compatible connection is available |
|
Drain access for RO |
Approved connection can be installed above the P-trap as directed |
Plumber or code-approved alternative is needed |
No permitted drain route is available |
|
Water pressure |
Falls within the selected model’s specified range |
Compatible booster or pressure regulation may be needed |
Pressure remains outside the model’s limits |
|
Electrical power |
Not required, or a suitable outlet is available |
Outlet installation or another system design is needed |
Powered model cannot be safely supplied with electricity |
|
Feed-water quality |
Known, microbiologically safe water within model limits |
Testing or pretreatment is needed |
Water is unsafe or unsuitable without treatment before RO |
|
Rental permission |
No permanent changes, or written permission is available |
Reversible installation may be possible |
Lease or property manager prohibits required modifications |
Treat this as a screening tool rather than a substitute for the product manual. Connection sizes, pressure ranges, clearances, faucet requirements, and acceptable water conditions are model-specific.
What an Under Sink Water Filtration System Is—and How RO Changes the Installation
An under sink water filtration system is a point-of-use device. It treats water for one location—usually a kitchen drinking-water faucet—rather than filtering all water entering the home.
Not every under-sink system uses reverse osmosis. A non-RO unit may route cold water through one or more filter cartridges and send the treated water directly to a dedicated faucet or, if specifically designed for it, the existing kitchen faucet. These systems generally do not create a reject-water stream.
Reverse osmosis uses household water pressure to move water through a semipermeable membrane. An RO system usually includes:
-
One or more prefilters
-
An RO membrane
-
A postfilter
-
A cold-water feed connection
-
Product-water tubing
-
A reject-water drain line
-
A dedicated or otherwise compatible filtered-water faucet
-
A storage tank or tankless delivery design
-
Optional pumps, monitors, or powered controls
The drain line is one of the most important differences. Because RO separates product water from concentrate, an under-sink RO installation needs an approved place to discharge that concentrate. A standard non-RO under sink water filter usually does not.
Under-Sink Water Filter vs. Under-Sink RO System
The better choice depends on what you want to treat and what your kitchen can support.
|
Feature |
Non-RO under-sink filter |
Under-sink RO system |
|---|---|---|
|
Treatment method |
Commonly carbon or multistage filtration |
Prefiltration plus membrane separation and postfiltration |
|
Drain connection |
Usually not required |
Typically required |
|
Storage tank |
Usually not required |
Required for tanked designs; not used by tankless designs |
|
Faucet arrangement |
Existing or dedicated faucet, depending on design |
Often a dedicated RO faucet or approved compatible connection |
|
Water pressure sensitivity |
Varies by design |
Pressure is central to membrane production and performance |
|
Wastewater |
Normally none from routine filtration |
Produces a concentrate or reject-water stream |
|
Installation complexity |
Usually lower |
Usually higher |
|
Electrical outlet |
Often unnecessary |
May be required for powered or pump-assisted designs |
RO is not automatically the best choice merely because it has more stages. The appropriate technology depends on your water-quality goals, verified contaminant-reduction claims, installation conditions, and tolerance for wastewater and maintenance.
When comparing claims, look at the exact model and the substances for which it has been tested or certified. NSF/ANSI 58 covers point-of-use reverse osmosis drinking-water treatment systems, but certification applies to the listed system and claims—not automatically to every contaminant or operating condition.
What Plumbing Is Required for an Under-Sink Water Filtration System?
At minimum, an under-sink filter needs a way to take water from the cold supply and deliver filtered water to a faucet. RO usually adds a drain connection.
The typical installation path includes:
-
Shut off the cold-water valve.
-
Install the model-approved feed-water adapter or tee.
-
Route feed tubing to the filter assembly.
-
Route filtered-water tubing to the designated faucet connection.
-
For RO, install and route the reject-water line to an approved drain connection.
-
Connect the storage tank if the system uses one.
-
Turn on the supply, flush as instructed, and check every connection for leaks.
Connection hardware is not universal. Supply valves, braided faucet hoses, rigid plumbing, and regional connection sizes can differ. Check the selected system’s included parts and installation manual before disconnecting anything.
Do not connect a household under-sink RO unit to hot water. Installation manuals consistently specify cold-water feed because excessive water temperature can damage membranes, housings, tubing, or other components.
Can an Under-Sink Filtration System Use the Existing Kitchen Faucet?
Sometimes—but only if the system is designed for that configuration.
Under-sink filtration generally uses one of three delivery arrangements:
-
Dedicated filtered faucet: The system supplies a separate small faucet installed through the sink deck or countertop.
-
Existing-faucet or full-flow connection: A compatible non-RO filter treats the cold water delivered through the main kitchen faucet.
-
Specialized compatible faucet configuration: Some systems may connect to a designated faucet with separate filtered- and unfiltered-water pathways.
A dedicated faucet is common for RO because product-water flow and tubing are separate from the main faucet supply. It also prevents filtered water from being used for tasks that do not require it. However, faucet requirements remain model-specific.
Before assuming the existing faucet will work, answer these questions:
-
Does the system manual expressly allow an existing-faucet connection?
-
Can the faucet and system handle the required flow and pressure arrangement?
-
Is there an unused sink accessory hole?
-
If not, can the sink deck or countertop be drilled safely?
-
Does local code require an air-gap faucet for the RO drain?
-
Will a multipurpose faucet be compatible with the system’s tubing and connections?
Do not improvise a connection simply because the tubing appears to fit. The faucet arrangement affects pressure, flow, sanitation, and leak risk.
Cold-Water Supply, Shut-Off Valve, and Feed-Adapter Compatibility
The shut-off valve should close fully before installation begins. A valve that is seized, leaking, heavily corroded, or unable to stop flow needs attention before the filter is connected.
Inspect the area for:
-
Moisture around the valve stem or supply connection
-
Corrosion or mineral buildup
-
Kinked or damaged supply hoses
-
Nonstandard or inaccessible fittings
-
A valve that turns but does not stop water
-
Insufficient room to install the feed adapter without stressing the hose
The adapter must match both the supply-side connection and the faucet-side connection. Avoid forcing mismatched threads or adding a chain of unapproved reducers. If the existing valve or piping needs modification, professional installation may be the safer choice.
Drain Connection, Air-Gap, and Local Plumbing-Code Considerations

A non-RO under sink water filter generally does not need a drain. An RO system normally does because the membrane sends concentrate away from the product-water line.
Installation manuals commonly place the drain adapter on a suitable drainpipe above the P-trap. The exact location matters. Poor placement can contribute to noise, backup, contamination risk, or drainage problems.
An air gap provides physical separation intended to help prevent drain water from flowing backward into the drinking-water system. Depending on the system and jurisdiction, this may involve an air-gap faucet or another approved arrangement.
Local requirements differ, so confirm:
-
Whether an air gap is mandatory
-
Whether the supplied drain adapter is permitted
-
Where the drain connection may be placed
-
Whether a garbage disposal changes the approved location
-
Whether a licensed plumber is required
-
Whether the system’s tubing and downstream materials comply with local code
Water Quality Association guidance emphasizes proper air-gap protection for RO installations. It also advises careful material selection downstream of RO because low-mineral product water may interact differently with metal plumbing. Follow the system manual, use materials approved for drinking-water applications, and comply with local plumbing rules rather than assuming one setup is acceptable everywhere.
What Water-Pressure or Connection Issues Should You Check Before Installation?
Water pressure is a fundamental operating requirement for reverse osmosis. Insufficient pressure can reduce production, slow faucet delivery, and affect system efficiency. Excessive pressure may stress components or fall outside the manufacturer’s warranty conditions.
Many household RO manuals specify minimum feed pressure in the general range of 30 to 40 psi and an upper operating limit around 100 psi. Other systems recommend a narrower range for optimal operation. These figures are not universal, so the selected model’s manual must control the decision.
Measure static pressure with an appropriate gauge, ideally at different times if household pressure fluctuates. Also consider dynamic pressure: a reading may look adequate when no water is running but drop substantially when a shower, washing machine, or irrigation system operates.
Check for:
-
Low pressure throughout the home
-
Pressure drops when other fixtures run
-
A partially closed or restricted shut-off valve
-
Kinked feed tubing
-
Sediment or scale restricting an older valve
-
A pressure-reducing valve that needs adjustment or service
-
Very high pressure that may require regulation
-
A private well pump that cycles through a wide pressure range
A compatible booster pump may help when pressure is below the preferred operating range, but it adds equipment, noise, power requirements, and maintenance. Do not add a generic pump without confirming compatibility with the RO system.
Water temperature also affects production. Cold water generally passes through an RO membrane more slowly than warmer water, while water above the permitted temperature can damage the system. Use the model’s specified feed-water temperature range.
Is Under-Sink RO Installation a DIY Project?
It can be, provided the installation uses standard accessible plumbing, the required faucet hole already exists, drain work is permitted, and the installer is comfortable making leak-free tubing connections.
A typical DIY installation may involve:
-
Turning off and disconnecting the cold-water supply
-
Installing a feed adapter
-
Mounting the filter assembly
-
Connecting color-coded or labeled tubing
-
Installing a dedicated faucet
-
Adding an approved RO drain connection
-
Positioning and connecting a storage tank
-
Flushing the system
-
Checking for leaks during startup and again after pressurization
Read the full manual before beginning. This identifies the required tools, tubing routes, clearances, flushing process, and any system-specific startup steps. Do not rely solely on a general installation video for a different model.
Professional installation is worth considering when:
-
The shut-off valve does not work
-
Plumbing is corroded, rigid, or nonstandard
-
Local code requires a licensed installer
-
A new electrical outlet is needed
-
Drain access is difficult
-
Cabinet modifications are necessary
-
The sink or countertop must be drilled
-
Existing leaks or water damage are present
-
The installation involves well-water pretreatment
-
You cannot verify a safe, compliant drain arrangement
After startup, inspect all connections while the system is filling. Check again after several hours and the following day because slow leaks may not appear immediately.
When Drilling or Countertop Material Makes Professional Installation Safer
A dedicated filtered-water faucet often requires a sink or countertop opening. An unused soap-dispenser, sprayer, or accessory hole may be suitable if its diameter and location match the faucet instructions. Never assume it will fit without measuring.
Drilling risk depends on the material:
-
Stainless steel may require an appropriate bit and careful control.
-
Porcelain-coated sinks can chip or crack.
-
Stone and engineered surfaces may require specialized bits and cooling methods.
-
Tempered glass must not be drilled.
-
Composite materials vary by manufacturer.
Also inspect below the proposed hole. Faucet hardware needs space for the mounting nut and tubing, and drilling must not strike sink clips, supports, drawers, wiring, or plumbing.
If the countertop warranty, lease, or material instructions restrict drilling, stop and seek permission or professional help. A filter that requires a dedicated faucet is not a practical choice when no usable hole exists and drilling is prohibited.
Under-Sink Cabinet Space Requirements
There is no single cabinet-size requirement for every under sink water filtration system. The correct measurement is the installed footprint of the specific model plus the clearance needed to connect tubing and replace filters.
Do not measure only the empty floor. The usable volume may be reduced by:
-
The sink basin and its mounting hardware
-
P-trap and drainpipes
-
Garbage disposal
-
Hot- and cold-water valves
-
Dishwasher connections
-
Pull-out trash or recycling bins
-
Cleaning-product organizers
-
Cabinet hinges and door hardware
-
Electrical outlets and cords
-
Water lines entering through the floor or wall
A system may physically fit but still be unsuitable if cartridges cannot be removed, tubing bends sharply, or the shut-off valve becomes inaccessible.
How to Measure for the Filter Assembly, Tank, Tubing, and Service Clearance

Start by emptying the cabinet. Measure the available width, height, and depth at several points because plumbing often makes the interior irregular.
Then map four installation zones:
-
Filter assembly zone: Confirm the unit can mount vertically or sit as directed without contacting pipes or the sink.
-
Tank zone: For tanked RO, measure the tank at its widest point and include the valve and tubing connection.
-
Tubing zone: Leave room for smooth routing without pinching or sharp bends.
-
Service zone: Allow enough space to remove cartridges, open covers, disconnect filters, and reach the shut-off valve.
Use the selected model’s dimensional drawing and installation template. Add all manufacturer-required clearances rather than relying on the housing dimensions alone.
A practical cardboard mock-up can reveal conflicts that a tape measurement misses. Reproduce the unit and tank footprints, place them in the cabinet, close the doors, and operate any pull-out storage. Verify that the P-trap remains serviceable and that the system can be maintained without dismantling the cabinet.
Some manuals allow a tank or filter assembly to be placed in an adjacent cabinet or nearby location. If considering this arrangement, confirm the permitted tubing length and elevation. Longer or poorly routed lines may reduce faucet flow or create difficult-to-detect leak points.
Tanked vs. Tankless RO Space Requirements
A traditional tanked RO system divides its footprint between a filter assembly and a pressurized storage tank. The tank provides a reserve of treated water, but it can occupy a substantial portion of the cabinet floor.
Tank pressure also matters. Many tanked systems use an air-charged bladder tank with a model-specific empty-tank precharge. Incorrect precharge can affect usable storage and faucet flow, so tank pressure should be adjusted only according to the system instructions.
A tankless RO design removes the separate storage tank and may free cabinet floor space. However, “tankless” does not mean installation-free. The main unit may be larger than expected, and it may require:
-
Electrical power
-
More wall or side-panel area
-
Ventilation or clearance around the housing
-
A specific mounting orientation
-
Accessible room for filter replacement
-
Feed and drain tubing routes
-
Adequate pressure and flow conditions
Compare total installed geometry—not just whether a tank is present.
Garbage Disposals, Pull-Out Storage, and Other Cabinet Conflicts
A garbage disposal can create both space and drain-routing problems. Its body may block the ideal mounting wall, while the discharge piping may limit where an RO drain connection can be installed.
Pull-out drawers and bins introduce a different issue: moving hardware can pinch tubing or strike the filter assembly. Open and close every cabinet component during the fit check.
Potential solutions include:
-
Moving removable organizers
-
Mounting the filter on the opposite cabinet wall
-
Choosing a compact configuration
-
Using an adjacent cabinet if the model allows it
-
Selecting a tankless design
-
Choosing a non-RO filter with no drain or storage tank
Do not route tubing where it can rub against drawer slides, sharp cabinet edges, disposal components, or hot surfaces.
Electrical-Outlet Requirements for Pump-Assisted or Powered Systems
Some under-sink systems operate without electricity. Others use power for a booster pump, control valve, display, leak sensor, monitoring feature, or tankless delivery system.
Check the product requirements before purchase. If power is required, verify that:
-
A suitable outlet is within the permitted cord reach
-
The outlet and installation comply with local electrical code
-
The cord will not cross wet plumbing or become pinched
-
The outlet remains accessible
-
Extension cords are not being used as a permanent workaround
-
Cabinet leaks would not expose an unsafe electrical arrangement
Do not assume an outlet serving a garbage disposal can automatically support another device or remain continuously powered. Disposal outlets may be controlled by a wall switch or configured in ways that are unsuitable for an RO system. Consult a qualified electrician when a new or modified outlet is required.
Rental and Apartment Installation Restrictions
Renters should obtain written permission before drilling a faucet hole, modifying a drainpipe, replacing a shut-off valve, or attaching equipment to the cabinet.
A reversible under-sink filter may be possible when it:
-
Uses compatible existing connections
-
Does not require countertop drilling
-
Does not permanently alter the drain
-
Can be removed without damage
-
Complies with the lease and building rules
RO is more likely than non-RO filtration to require permanent changes because of the faucet and drain connections. If those modifications are prohibited, a simpler under-sink filter that uses an approved existing-faucet arrangement may be a more practical option.
Feed-Water Quality, Pretreatment, and Model-Specific Limitations
Installation compatibility is not only about plumbing. The feed water must also suit the treatment system.
NSF/ANSI 58 point-of-use RO systems are intended for microbiologically safe water of known quality. An RO drinking-water system should not be treated as a substitute for disinfection when a water source may be microbiologically unsafe.
Municipal water users can review their utility’s water-quality report. Private well users should test the water through an appropriate laboratory and investigate changes in taste, odor, color, or well conditions rather than choosing treatment by guesswork.
Pretreatment may be needed for conditions such as:
-
Significant sediment
-
Hardness or scaling potential
-
Iron or manganese
-
High total dissolved solids
-
Oxidants or other conditions that may affect a membrane
-
Known microbial concerns requiring appropriate treatment before RO
The required response depends on the test results and the selected system. A generic statement that “RO removes” a substance is not enough. Verify that the exact model has an applicable reduction claim and that the feed concentration, pressure, temperature, and other operating conditions remain within its documented limits.
The same caution applies to nitrate and nitrite. Some certified RO systems have model-specific claims that apply only below stated influent concentrations and at or above a stated pressure. Do not generalize one system’s certification to another.
Who Is an Under Sink Water Filtration System or RO System Best For?
The right system is the one that addresses a defined water-quality goal while fitting the kitchen’s physical and plumbing conditions. RO is useful in some situations, but a non-RO under-sink filter may offer a simpler installation when membrane treatment is unnecessary.
When an Under-Sink RO System Is a Practical Fit
An under-sink RO system is a strong candidate when:
-
The household wants point-of-use membrane treatment at the kitchen sink
-
The water source is microbiologically safe and of known quality
-
The selected model has relevant, verified reduction claims
-
Cold-water pressure falls within the model’s operating range
-
A compliant drain connection can be installed
-
There is room for the unit and any storage tank
-
A faucet hole is available or drilling is permitted
-
Required electrical power is available
-
The household accepts reject-water production and ongoing maintenance
After the kitchen passes these checks, shoppers can compare under-sink reverse osmosis systems by installation footprint, tanked or tankless design, pressure requirements, faucet configuration, power needs, documented reduction claims, and maintenance access.
When a Non-RO Under-Sink Water Filter May Be the Better Choice
A non-RO filter may be more appropriate when the main goal is improving qualities addressed by the selected filtration media and verified claims, without adding an RO membrane and drain line.
It may also fit better when:
-
Cabinet space is limited
-
No approved RO drain connection is available
-
The household wants to avoid a storage tank
-
Electrical power is unavailable
-
Existing-faucet delivery is preferred
-
Water pressure is marginal for RO
-
Rental rules prohibit permanent drain or countertop changes
-
Reject-water production is an important concern
Non-RO filters still require compatibility checks. Some need a dedicated faucet, while others connect to the existing cold-water faucet line. Review the system’s pressure limits, flow arrangement, connection sizes, dimensions, and contaminant-reduction documentation.
If those conditions better match the kitchen, compare under-sink water filter options after measuring the cabinet and identifying the desired faucet configuration.
Choosing the Best Under-Sink Water Filter for Your Installation Conditions
The best under-sink water filter is not simply the system with the most stages. It is the model that fits the measured space, uses compatible connections, addresses the conditions identified in your water, and remains accessible for maintenance. After confirming those requirements, compare water filters for sink installations by treatment method, documented reduction claims, footprint, faucet and drain configuration, pressure range, power needs, and cartridge access.
“Certified,” “tested,” and “meets a standard” do not mean the same thing. Certification indicates that an accredited certifying organization has evaluated the product for specified requirements and claims. Testing may refer to a narrower evaluation, while “meets” may be a manufacturer statement. Review the documentation for the exact model rather than relying on broad category language.
Explore Under-Sink RO Systems That Fit Your Kitchen
Once you have checked your cabinet space, water pressure, faucet setup, and drain access, the next step is finding a system that matches your installation conditions. Compare these Frizzlife options and explore replacement filters for long-term maintenance.
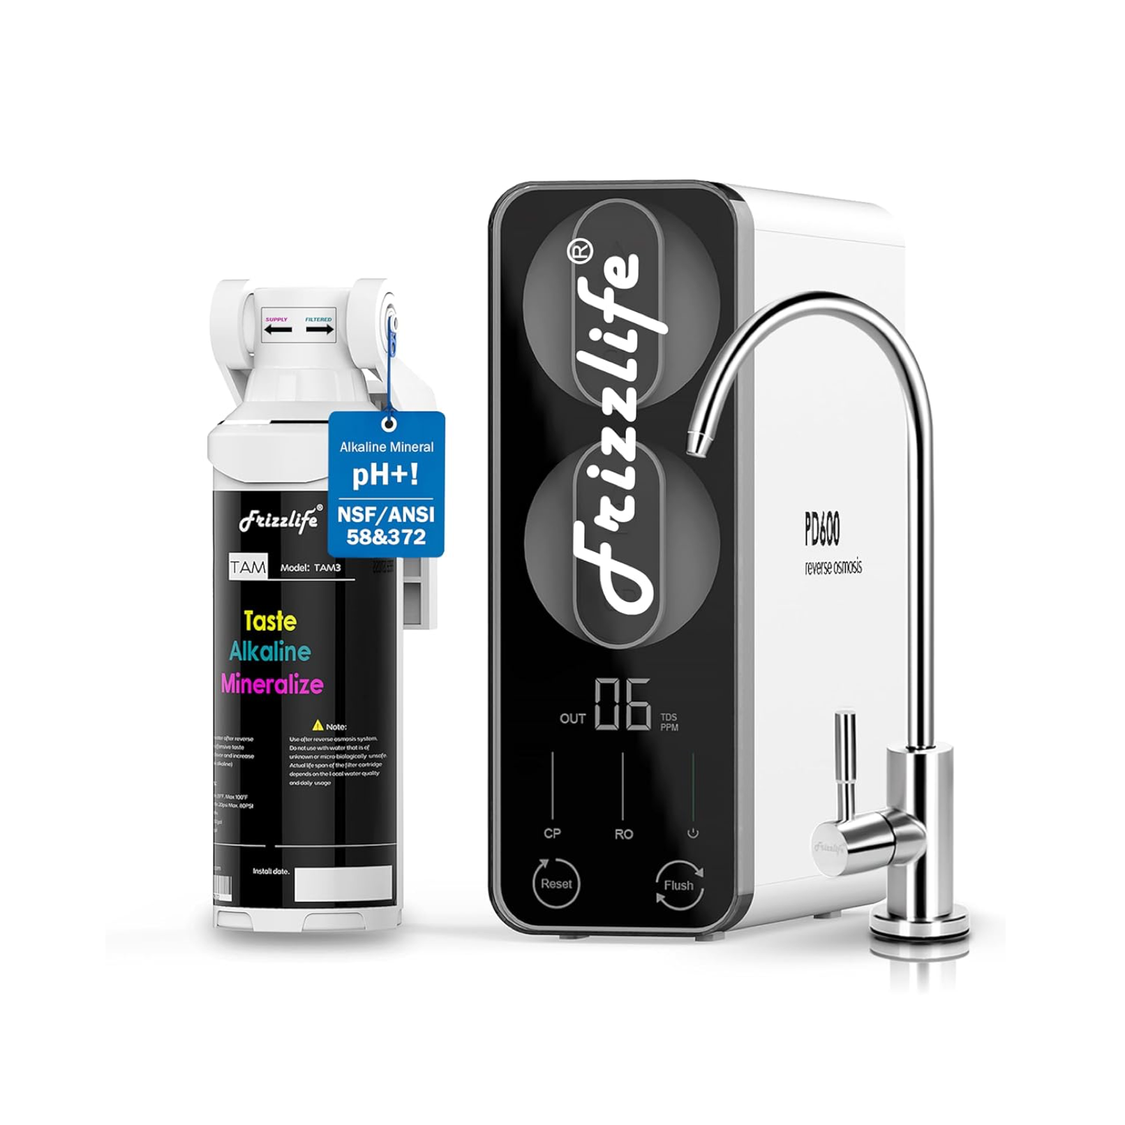 TANKLESS RO WITH SMART MONITORING
Frizzlife PD600-TAM3
A tankless reverse osmosis system with 600 GPD capacity, alkaline remineralization, and a smart TDS display for everyday kitchen use.
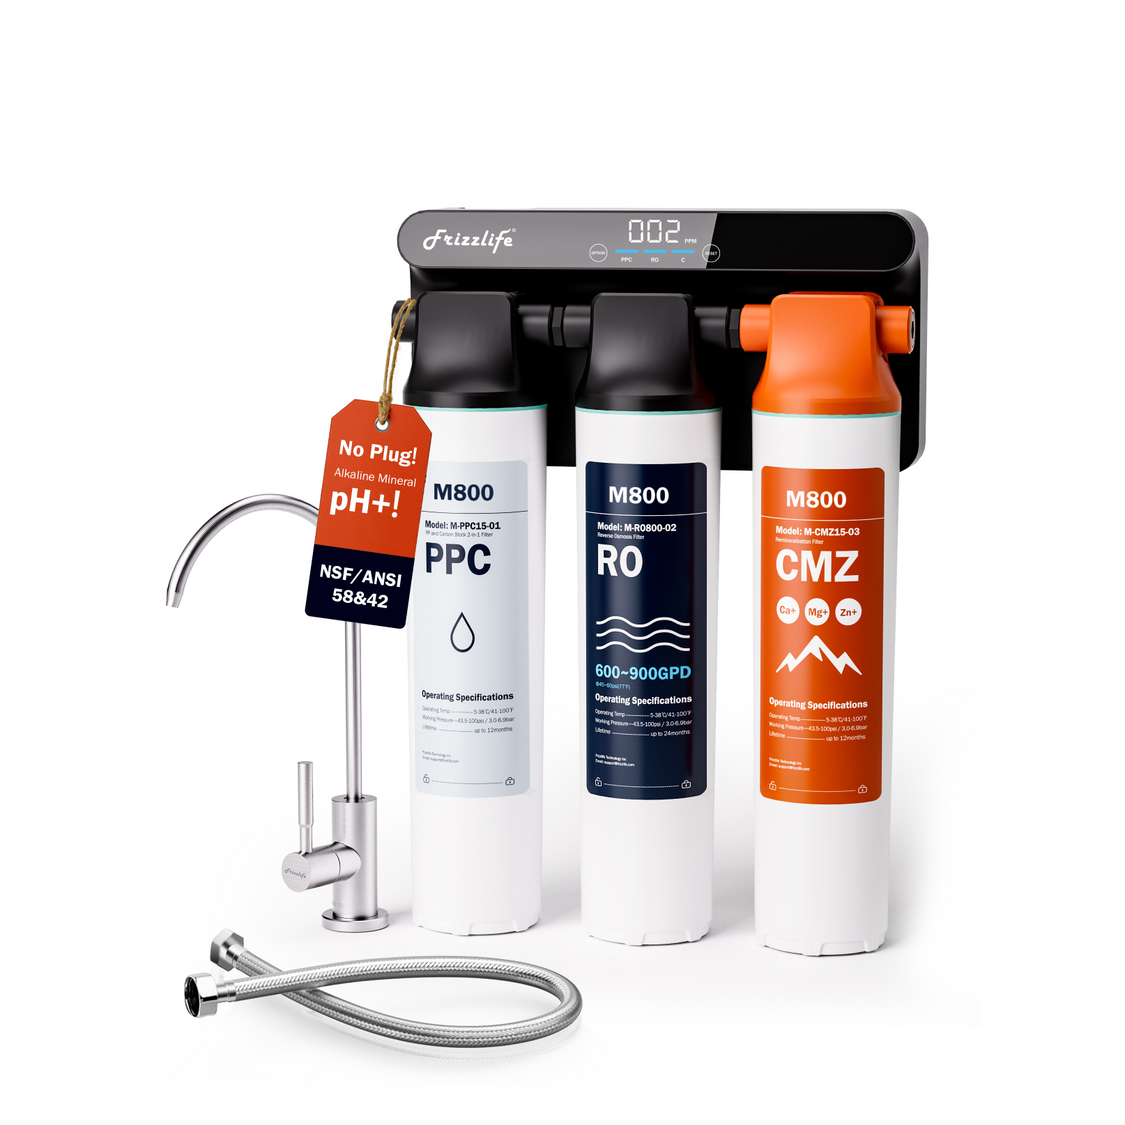 NON-ELECTRIC TANKLESS RO
Frizzlife M800
A non-electric tankless RO system designed to operate using household water pressure, with up to 900 GPD rated capacity and alkaline remineralization.
 FILTER REPLACEMENT & MAINTENANCE
Replacement Filters
Plan for maintenance before choosing your system. Find replacement cartridges by model and check filter compatibility for your Frizzlife water filtration system.
Installation requirements differ by model. Before purchasing, review the official product manual for cabinet clearance, water pressure, faucet compatibility, drain connections, electrical needs, and filter maintenance.
Final Go/No-Go Checklist Before Selecting a System
Your kitchen is likely ready when you can answer yes to every requirement that applies:
-
I have an accessible cold-water supply.
-
The shut-off valve closes fully and does not leak.
-
I know which feed adapter and connection sizes are required.
-
Household pressure is within the selected model’s range.
-
I have measured usable cabinet width, height, and depth.
-
The filter assembly fits with service clearance.
-
A tank fits if the system uses one.
-
Tubing can be routed without kinks or moving-cabinet conflicts.
-
The faucet configuration is compatible.
-
An existing hole is available, or drilling is permitted and safe.
-
A code-compliant drain route is available for RO.
-
Air-gap requirements have been confirmed.
-
A suitable outlet is available if the system requires electricity.
-
Feed-water quality is known and within the model’s limitations.
-
Any necessary pretreatment has been identified.
-
Rental, warranty, and local-code restrictions have been checked.
-
I have read the exact model’s installation manual.
If any answer is uncertain, pause before purchasing. Measure again, test the water or pressure where needed, and consult a qualified plumber, electrician, countertop professional, or water-treatment specialist. Once the kitchen passes the fit check, choosing between an under-sink filter and an under-sink RO system becomes a much clearer decision.
References
-
NSF: NSF/ANSI 58 Reverse Osmosis Drinking Water Treatment Systems
-
Water Quality Association: Getting Smart With Reverse Osmosis Systems
-
U.S. EPA WaterSense: Notice of Intent for Point-of-Use Reverse Osmosis Systems